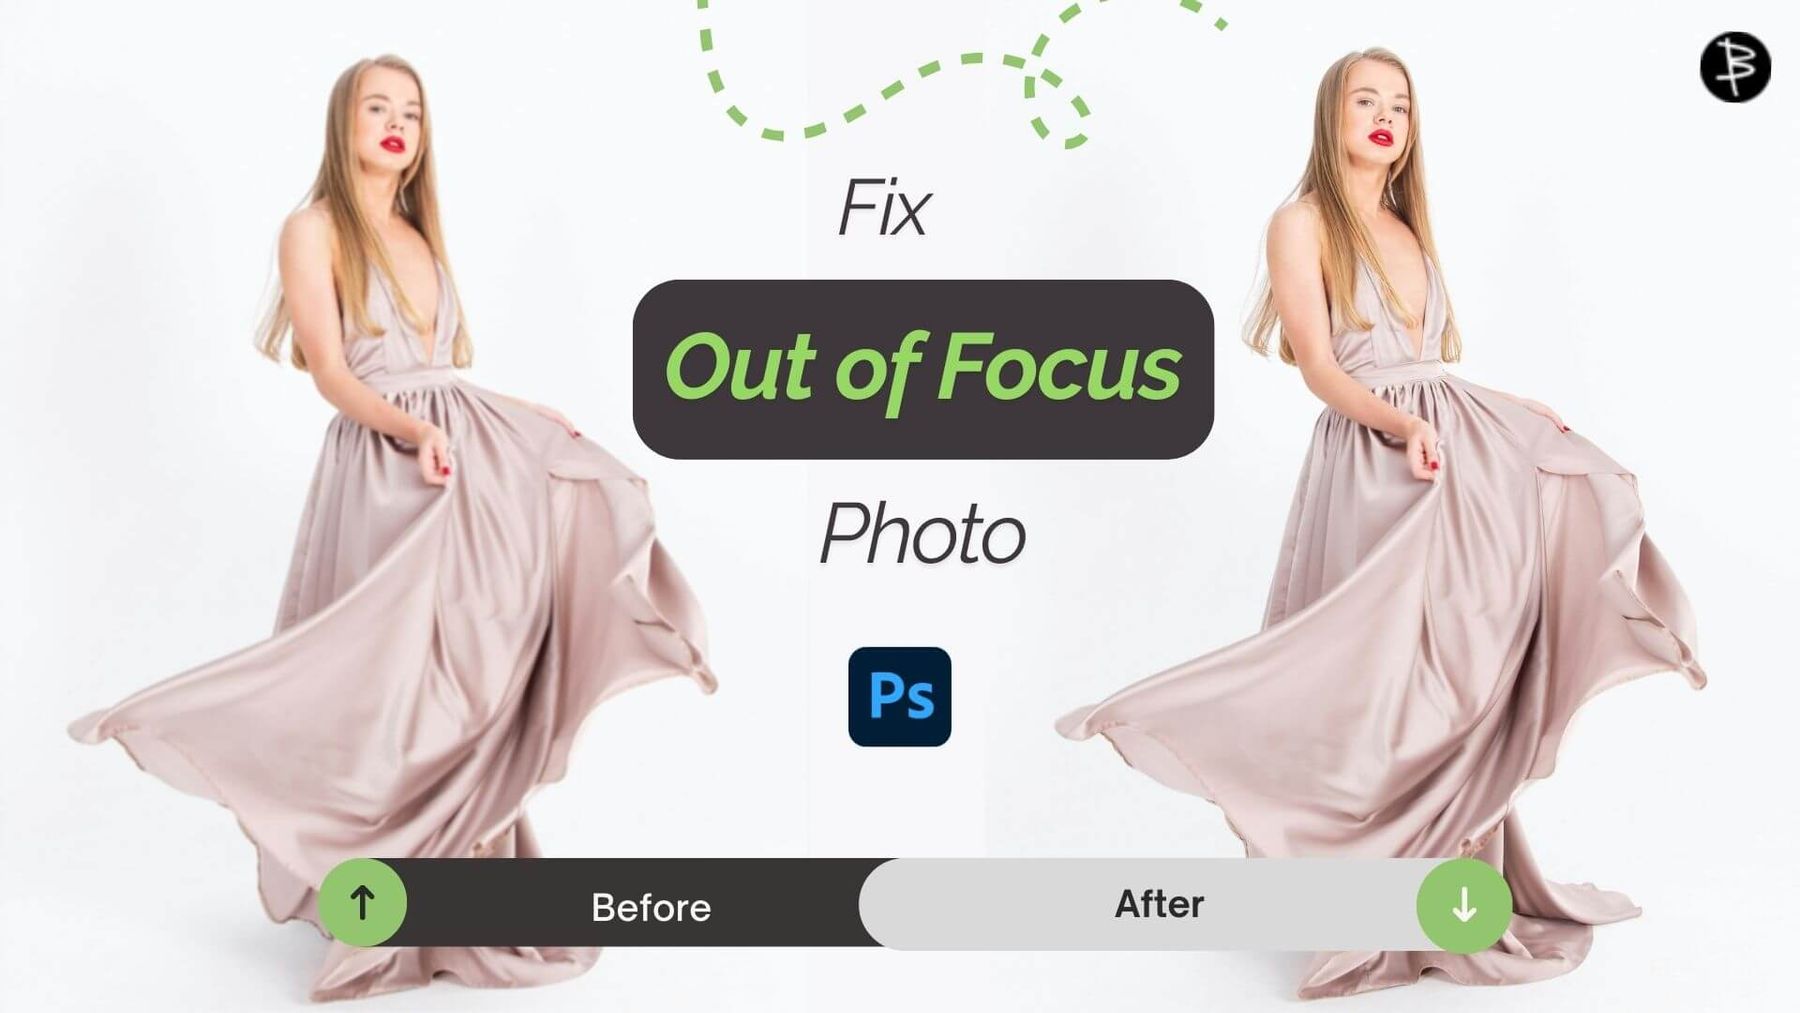
How to Fix Out of Focus and Blurry Photos using Photoshop
Learn how to fix out-of-focus and blurry photos using Photoshop. Follow this easy step-by-step guide to sharpen your images and correct common focus issues.

Taking a photo is challenging, but the real challenge starts when it's time to edit in Photoshop. Editors spend countless hours refining pictures to achieve a phenomenal look. Raw photos typically have flaws, but Photoshop has tools to fix them. With every new editing challenge, Photoshop keeps upgrading, adding tools to make the process faster, easier, and less exhausting for editors.
One common problem in photos is focus. Have you ever noticed the focus isn't where you wanted it, or the entire image looks blurry? In this guide, we'll show you how to fix focus issues and remove blurs using Photoshop. We'll also cover the top three causes of photo blur and practical solutions for each.
Reasons Behind Photo Blur
Photos can get out of focus for various reasons. And it will take page after page to explain each. So, we have picked some of the common reasons for photo blur and explained a step-by-step process on how to fix these.
Camera Shake
This kind of blur is called 'Motion Blur' and is used to create cool effects. But sometimes, it takes away the focus from the subject. It occurs due to the movement of the camera or subject whilst taking a long shot. On film, motion blur happens when an object's position changes during the interval when a camera's shutter is open. If the object moves too quickly, it may not be able to maintain sharp focus, leading to a blurred perception.
How to Fix Motion Blur
Way: 1 (Filter> Sharpen> Shake Reduction> Radius)
- If your main subject gets obstructed, in that case, Go to the filter option. There you will see a section named 'Sharpen.'
- Shake Reduction- Under that catalog, you will find the option 'Shake reduction.'
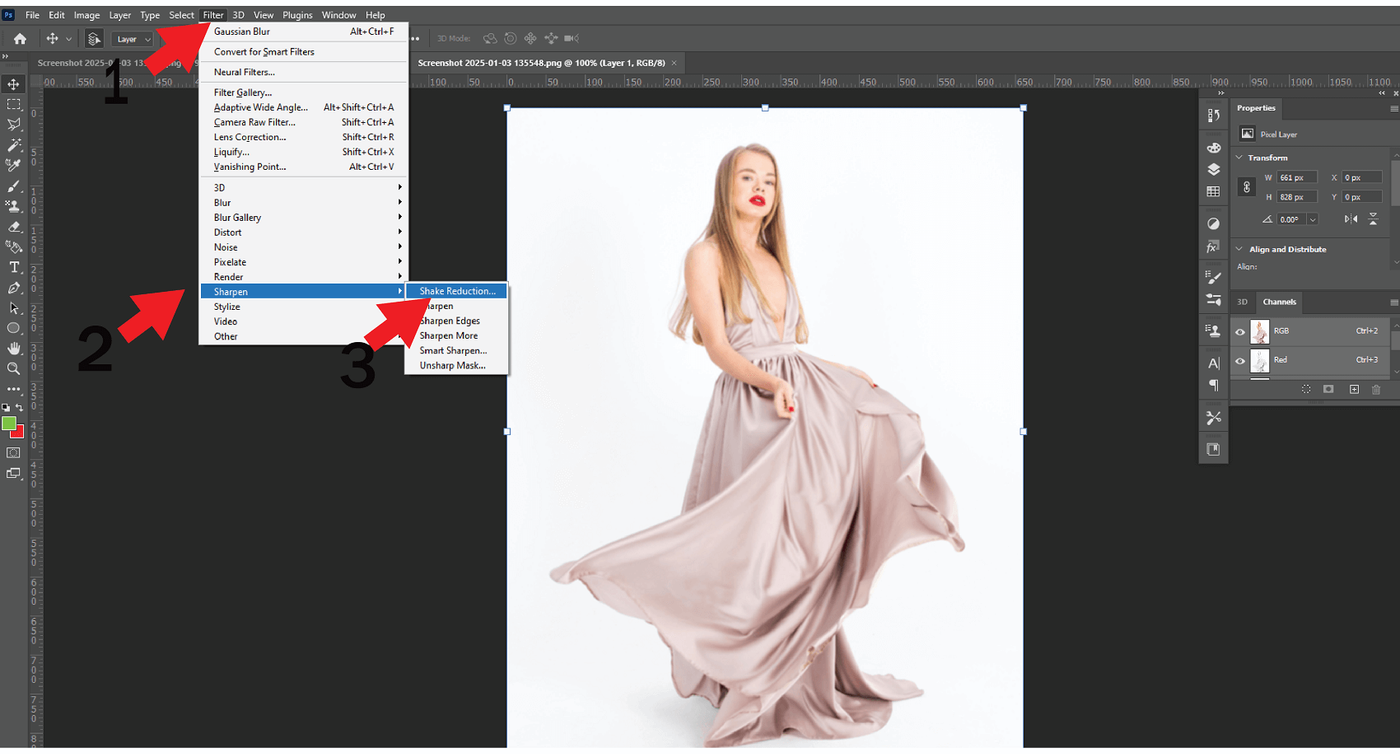
- Adjust Radius- Now, you will be provided with a scale where you can adjust the radius. Choose the section from where you want to remove the blur.
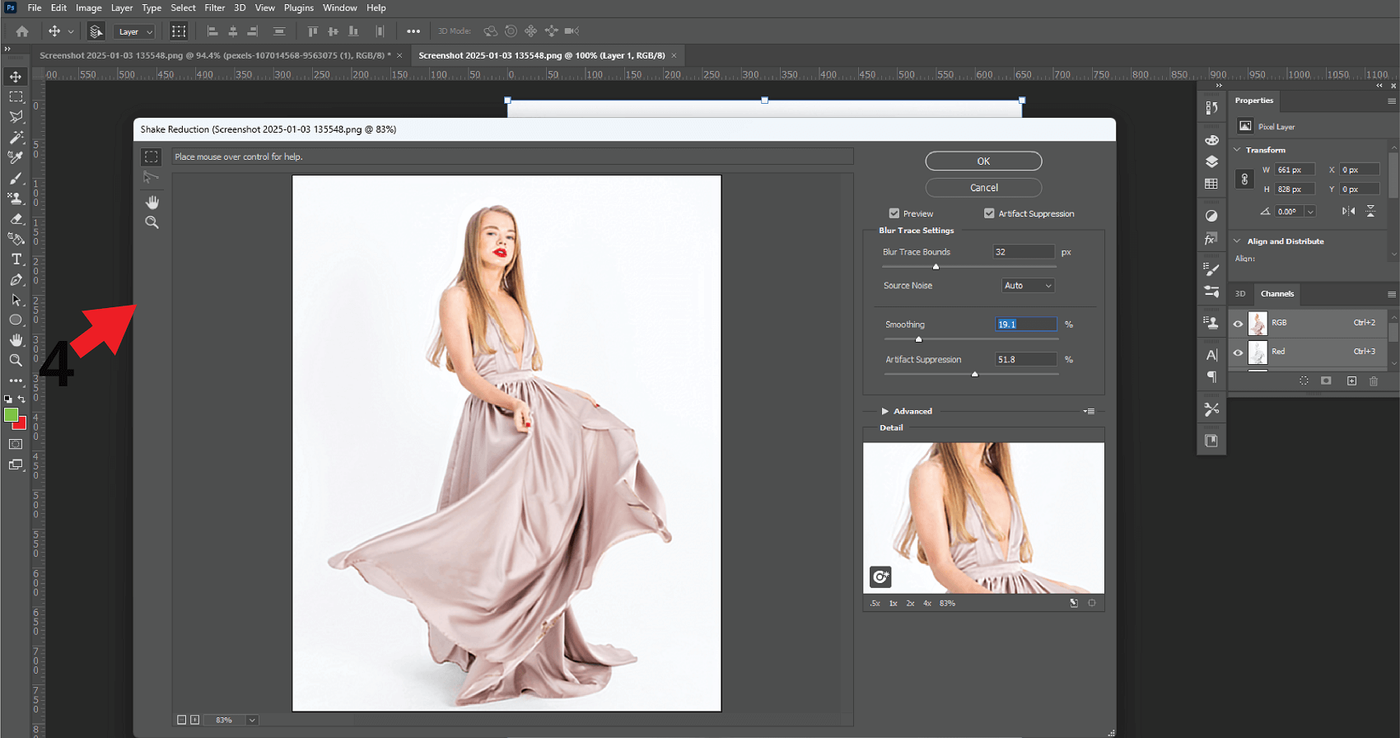
Based on the intensity, the blurriness may not go completely.
Way: 2 (Duplicate Layer> Smart Sharpen> Motion Blur> Adjust Angle > Adjust Radius and angle)
- First, duplicate of the main the layer by pressing (Ctrl+J)
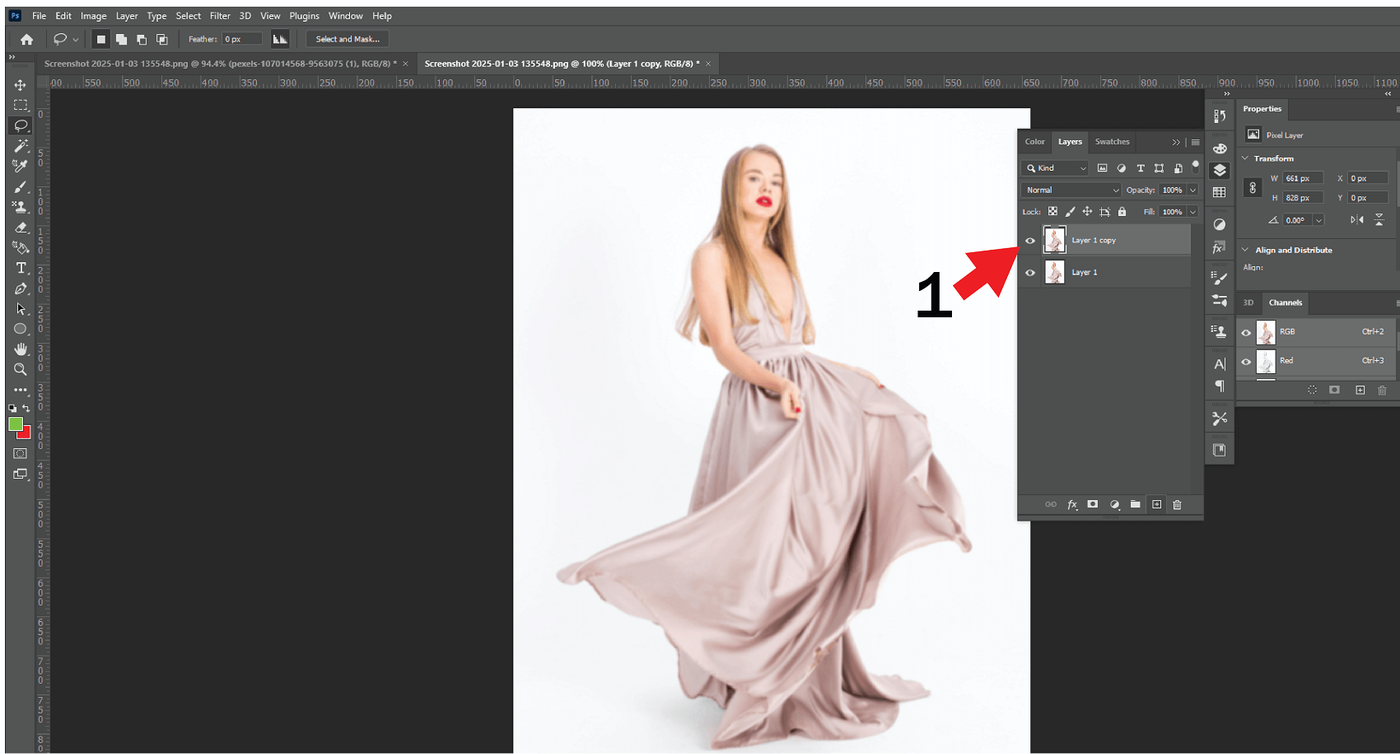
- Click the main layer, right-click on the mouse, and select the smart object option.
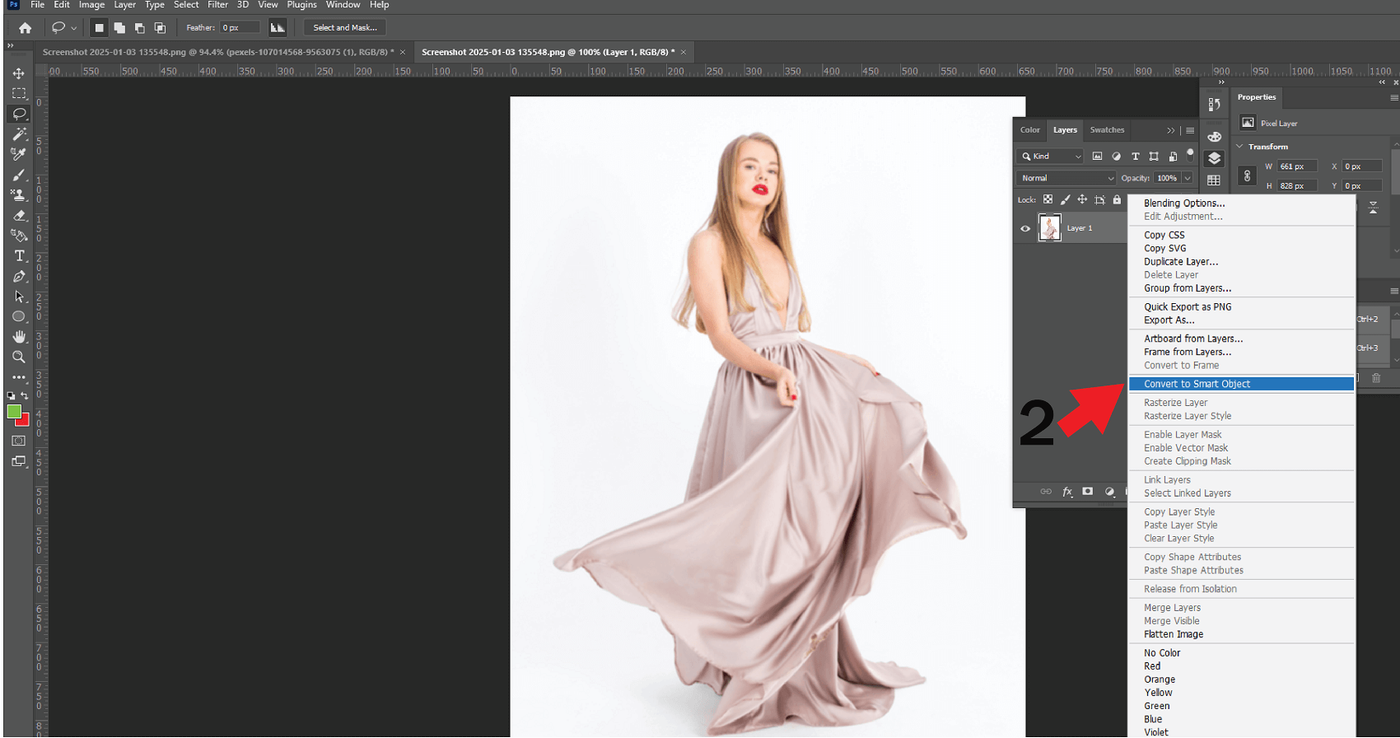
- Go to filter and press Sharpen. There, you will find an option named 'Smart Filter.'

- You will find the 'Motion blur' option right there. Press on it and press Remove.
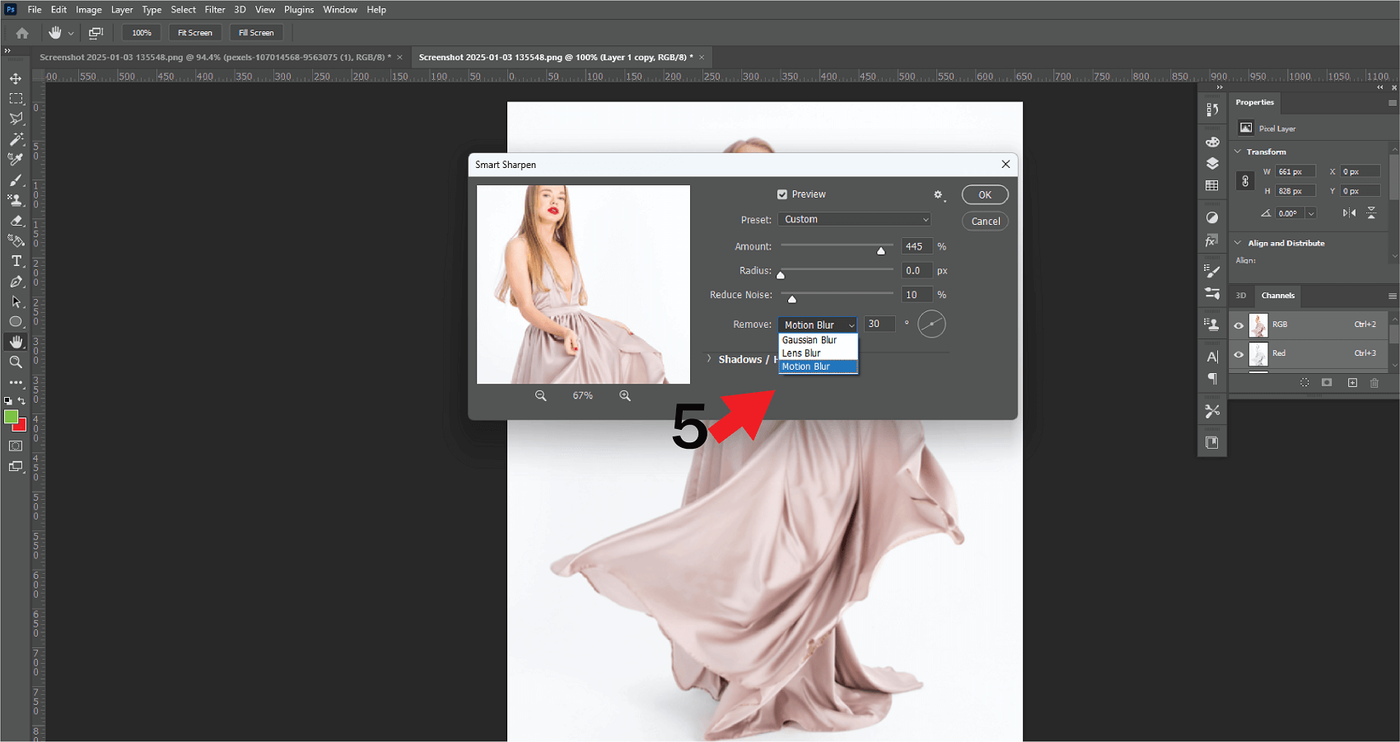
- Now adjust the angle according to your choice and play around with the options. Increase sharpness but focus on the noise, too. More noise will bring a grainy effect to your photo.
There you go. Your out-of-focus picture is fixed.
Way: 3 (Filter> Blur Gallery> Select Type> Tilt-Shift> Adjustment)
As the name suggests, under the blur gallery, you will have multiple blur options. Whatever blur you feel your photo contains, you can adjust it with this feature.
- Open the photo that you want to edit in Photoshop.
- Go to Layer and then click on “Smart Objects,” which will bring another set of options. Click on “Convert to smart object” to enable using filler effects later.
- Now, choose filter blur gallery and select the tilt shift effect.
- You can now move the center of the blur effect and adjust the feather to the out of the focus area. If needed, you can also rotate the tilt-shift and adjust the blur effect. When done, click on “OK,” and your image will be much better now.
Subject Movement
Sometimes, the subject may change its position too fast. Thus, you focus on the wrong object. While adjusting your camera settings can prevent focus issues, if the photo is already taken, Photoshop is your best tool to fix it. So here is how you fix it.
Way: 1 (Lasso tool > Fill > Content Aware fill)
- Duplicate the layer to avoid any sort of destruction.
- Use the lasso tool from the object selection tool. It helps you to select the particular portion of an object.
- After selecting the area, right-click and choose Fill.
- Under Fill, you will see content-aware Fill.
- Now, match the colors with the surroundings to bring the focus and edit the segments according to our perspective.
Select all the layers while using it. If you select one layer only, the Fill will apply only to that, keeping other layers unaffected. This can be an issue in the final product. Another thing to keep in consideration is the usage of lasso tools. It's pretty time consuming and you have to redo the same task if preferred areas are not selected.
Way 2- Frequency Separation
If you use Photoshop, you are going to hear a lot about Gaussian blur. This also is seen in a photo, giving a hazy touch to the photo. You can undo it and bring the focus back by tweaking it in Photoshop. We call it frequency separation.
- Duplicate your main layer.
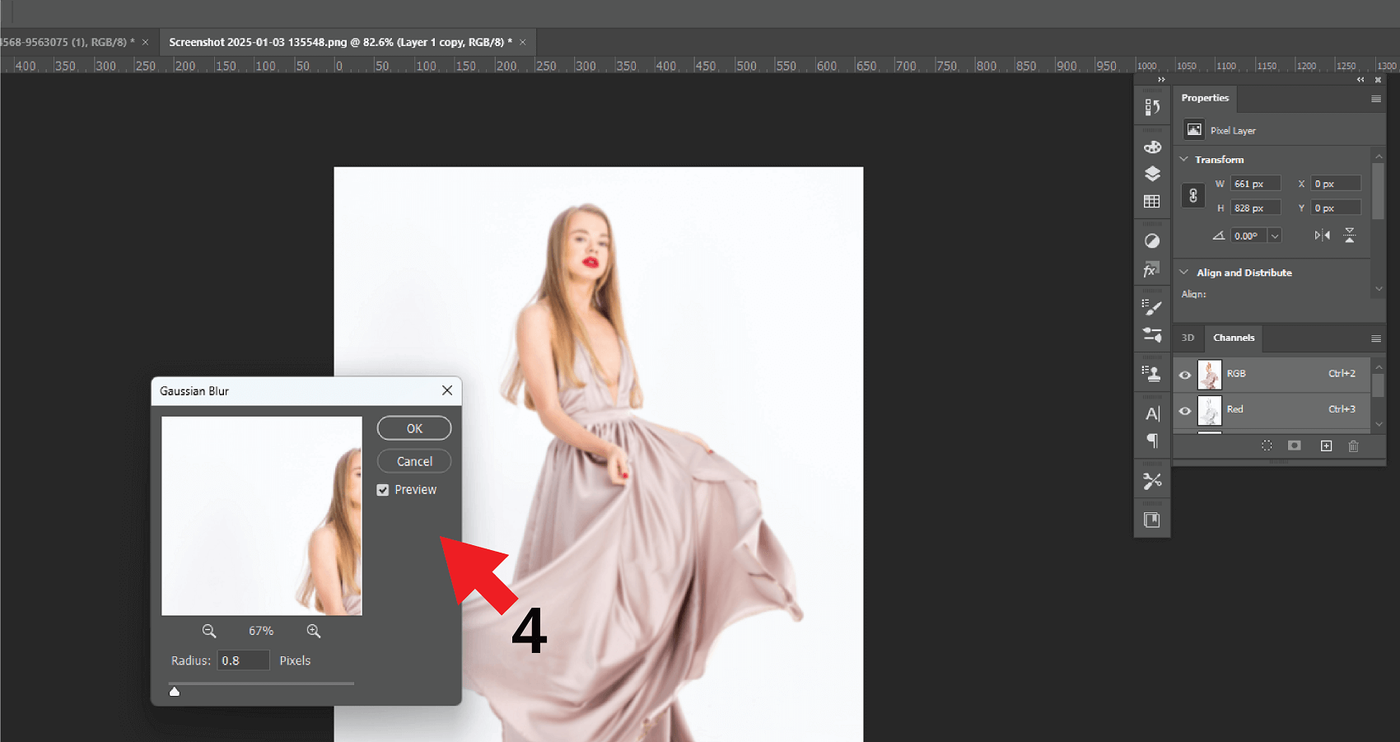
- Go to the filter option and tap on the blur. There, you will see the option Gaussian blur. Click on that
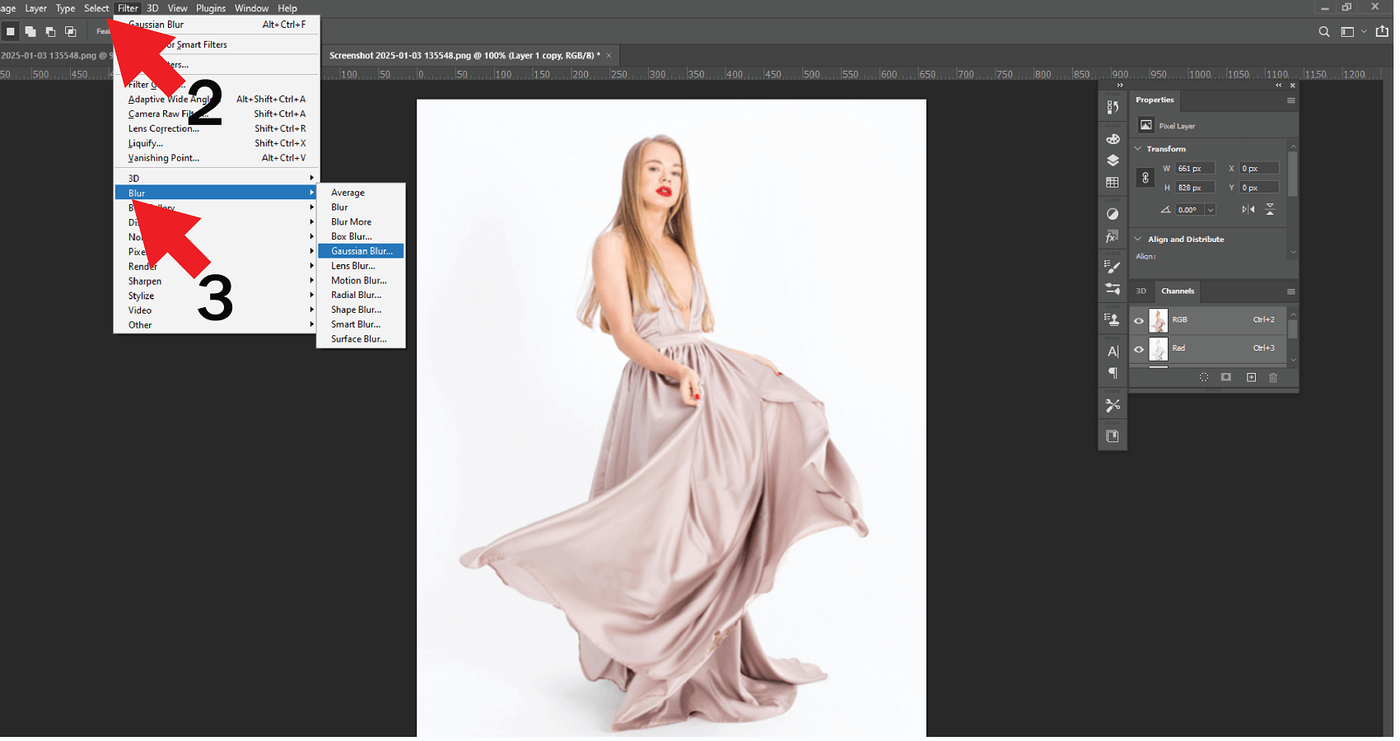
- You will find two options over there. One is radius, and the other one is level. Radius is used to select the specific place and level to decrease and increase the blurriness.
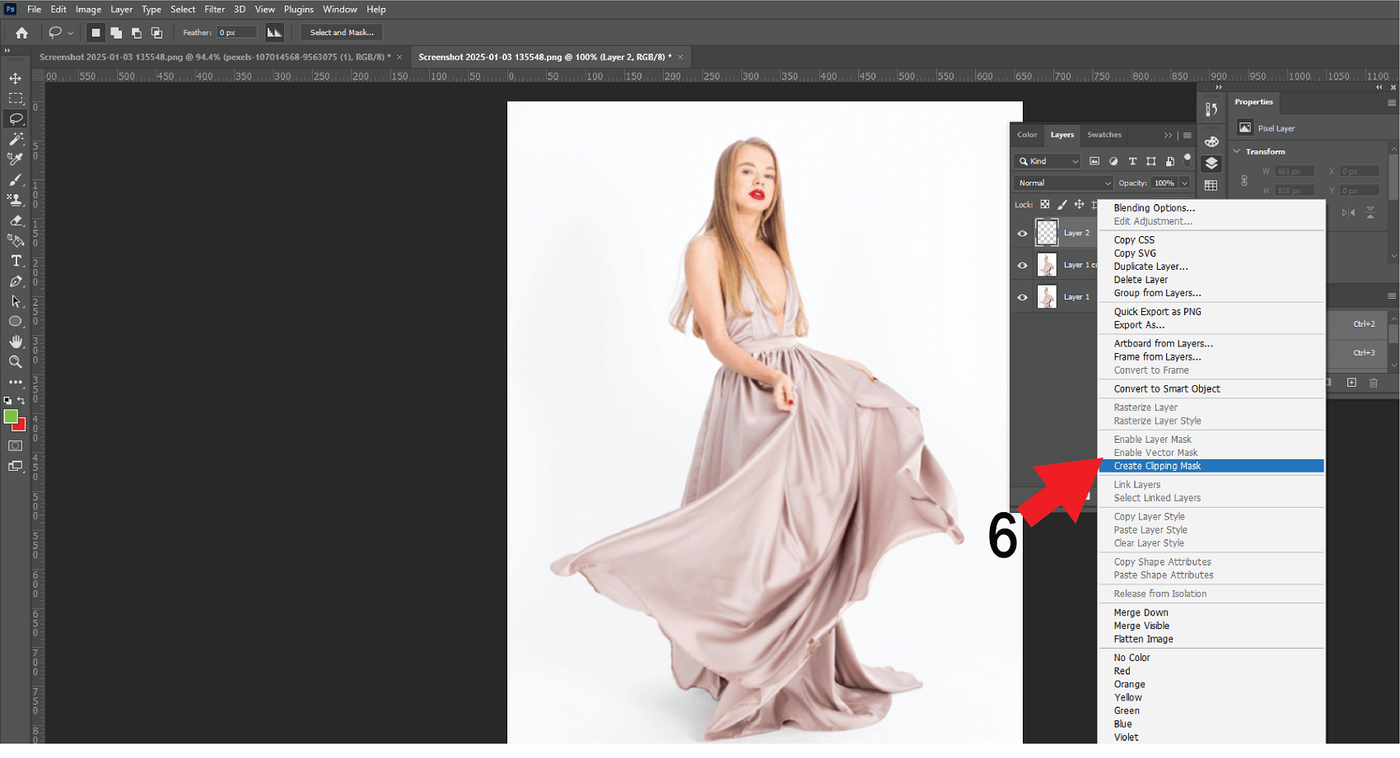
- Now, create a new layer.
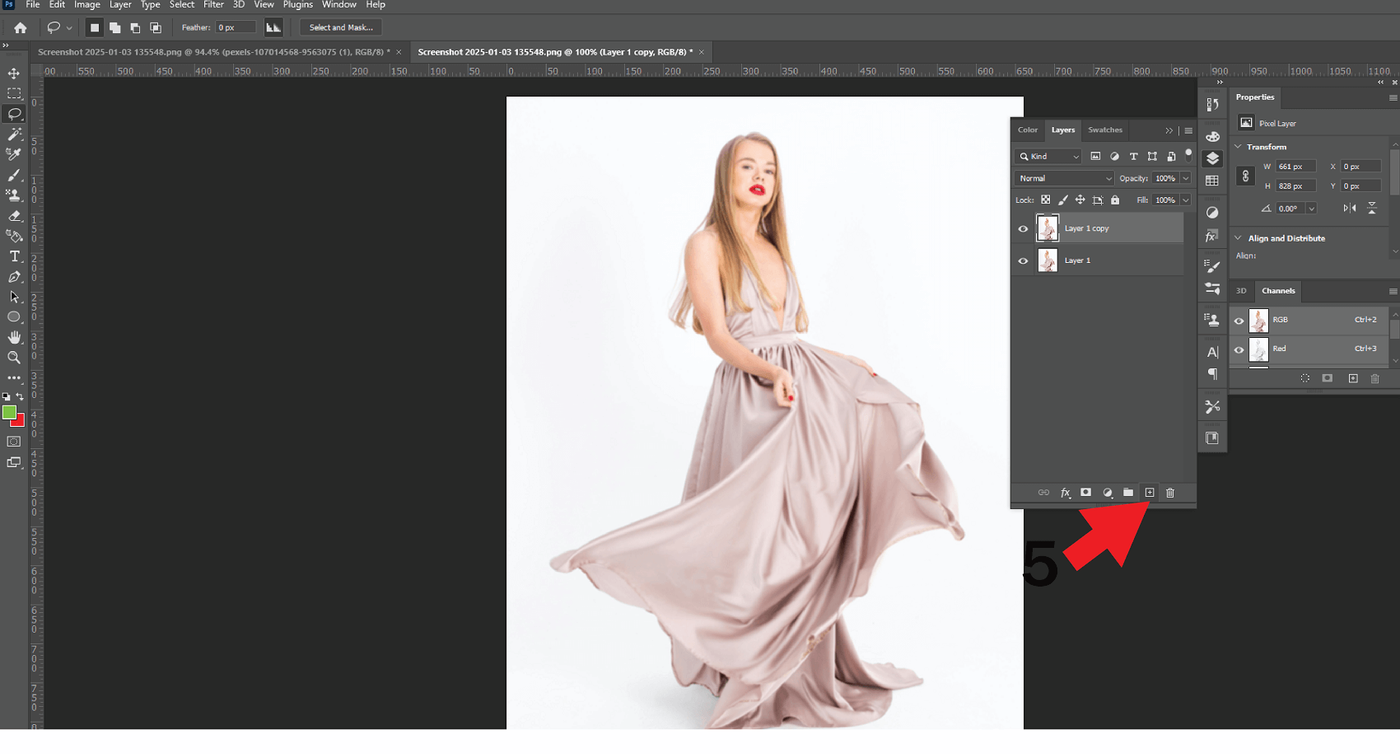
- Tap on the blurred layer and create a clipping mask.
- Now select the new layer. Go to 'Edit' and select 'Fill'. Choose 50% Gray.
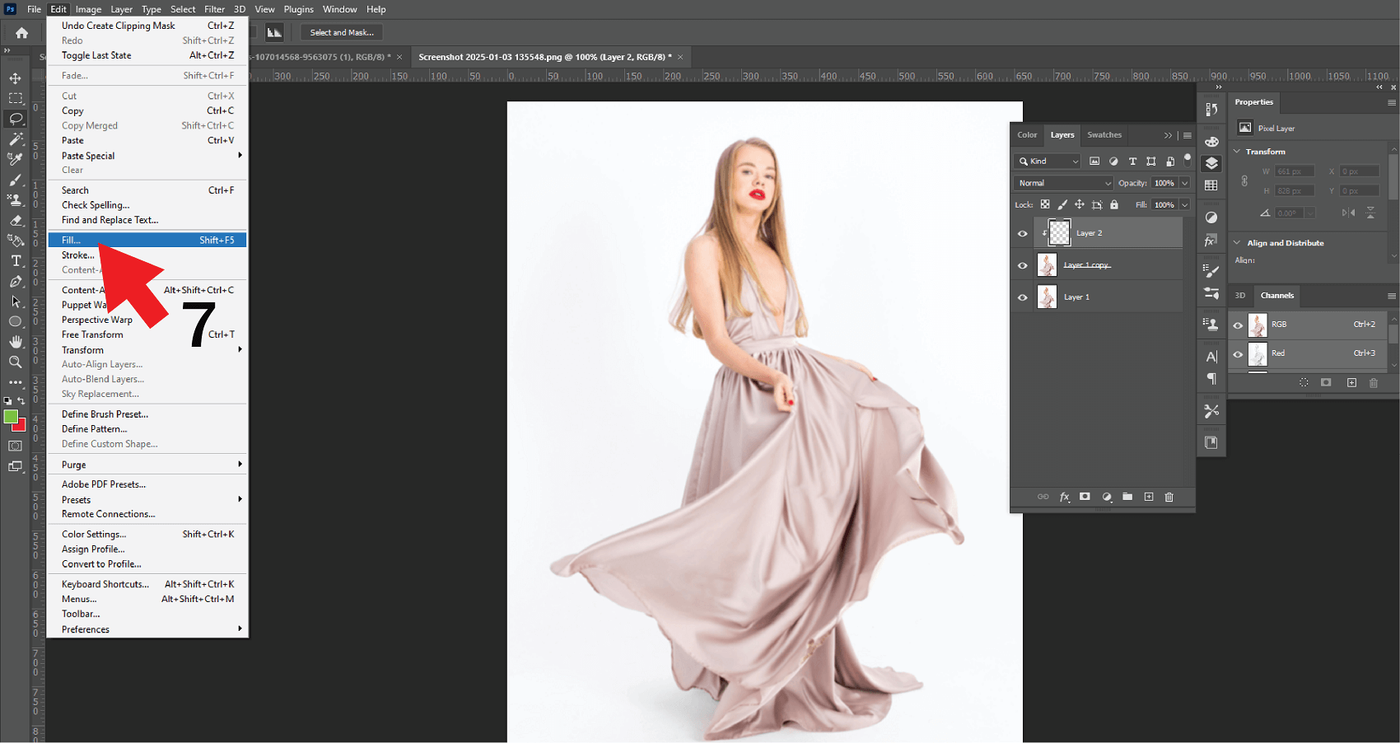
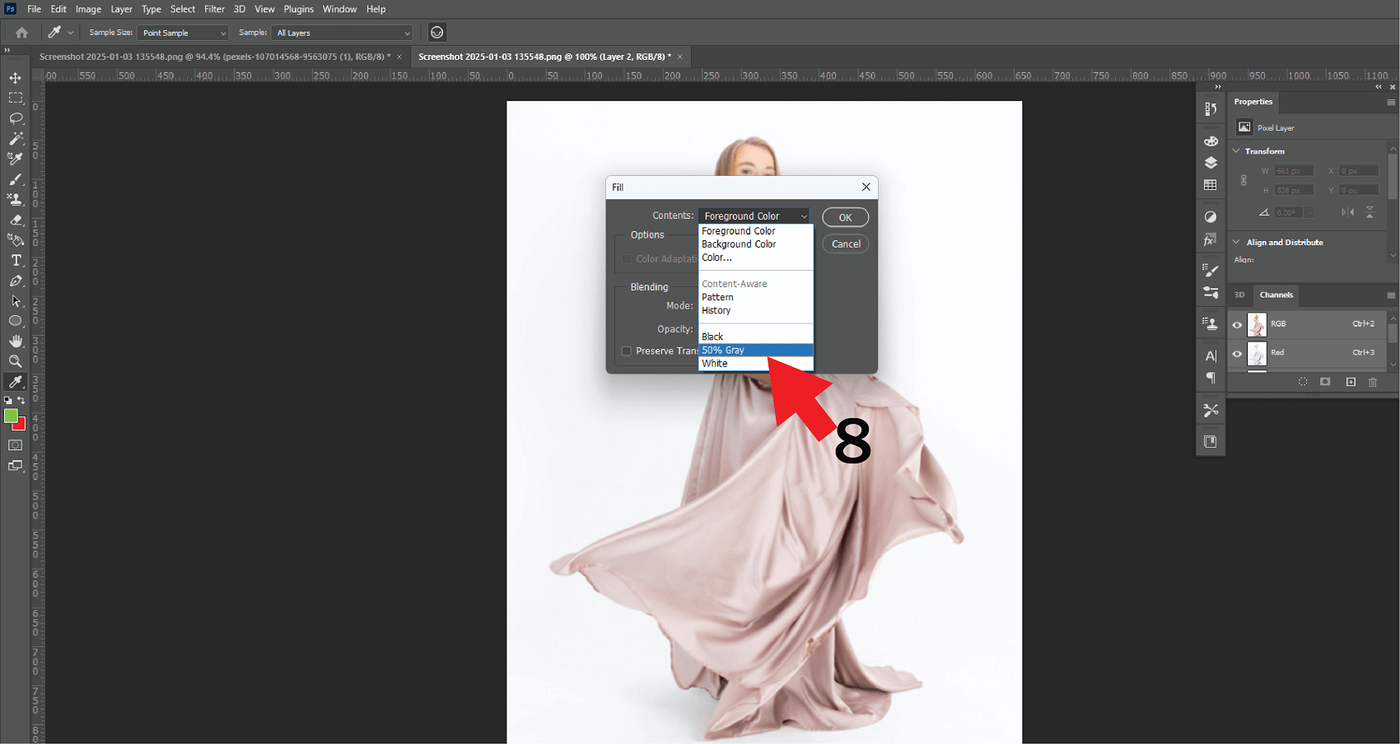
- Go to the filter. From there, tap on Sharpen and choose Unsharp Mask. Adjust the area according to your liking.
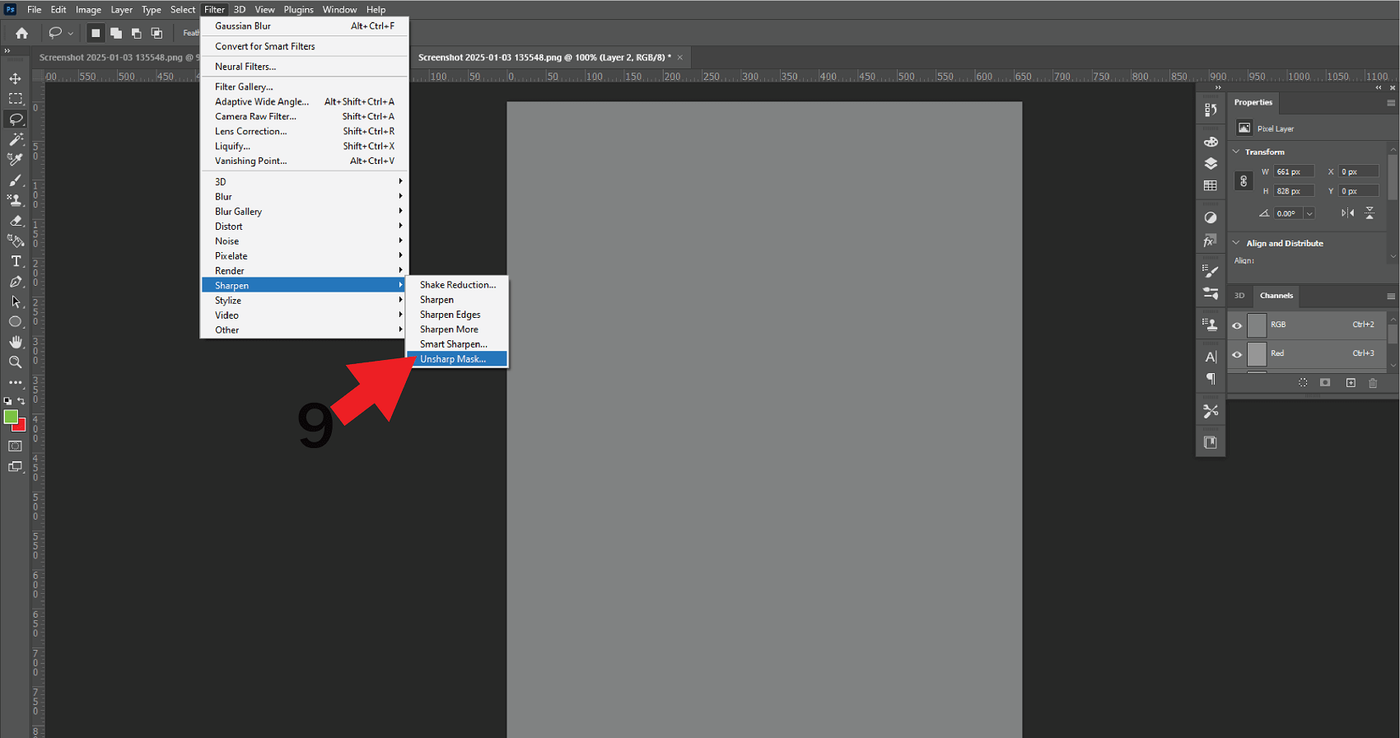
- Turn on smart sharpen and play around with the tools. We have discussed the tools in the first segment.
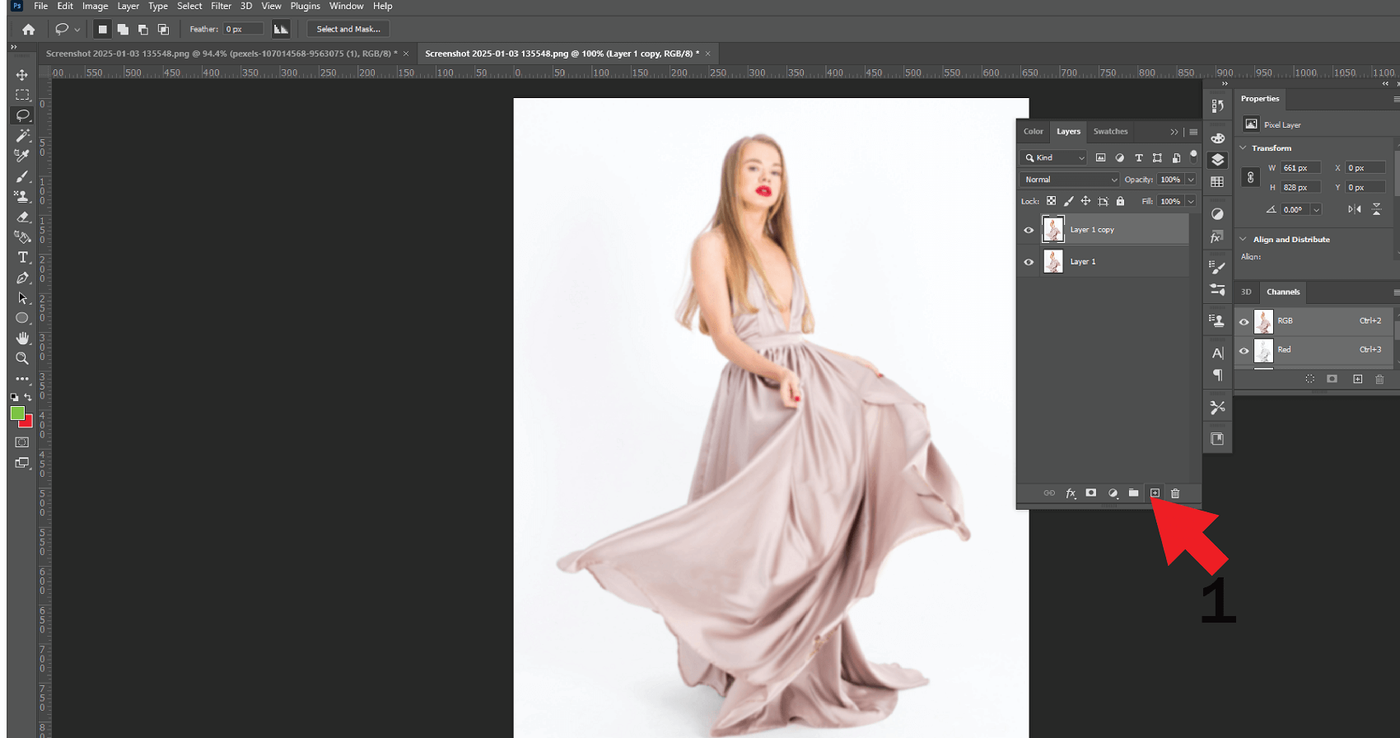
- After covering all the steps, you can adjust the layers and finally merge them.
If you are a newbie, it will take a lot of time if you have zero knowledge of the tools. It's an advanced method and will surely run down many issues.
Shallow Depth
Ever clicked a portrait photo. You will see your image completely sharp and crispy, leaving the rest of the part blur. It's called shallow depth, where the focus is on a single object. It can be a fault in the setting where the camera focuses on a single object. Now, how do you fix this issue and bring other parts into the limelight?
Way 1- Iris Blur
- Duplicate the image.
- Go to the filter. Then go to the blur gallery and select Iris Blur.
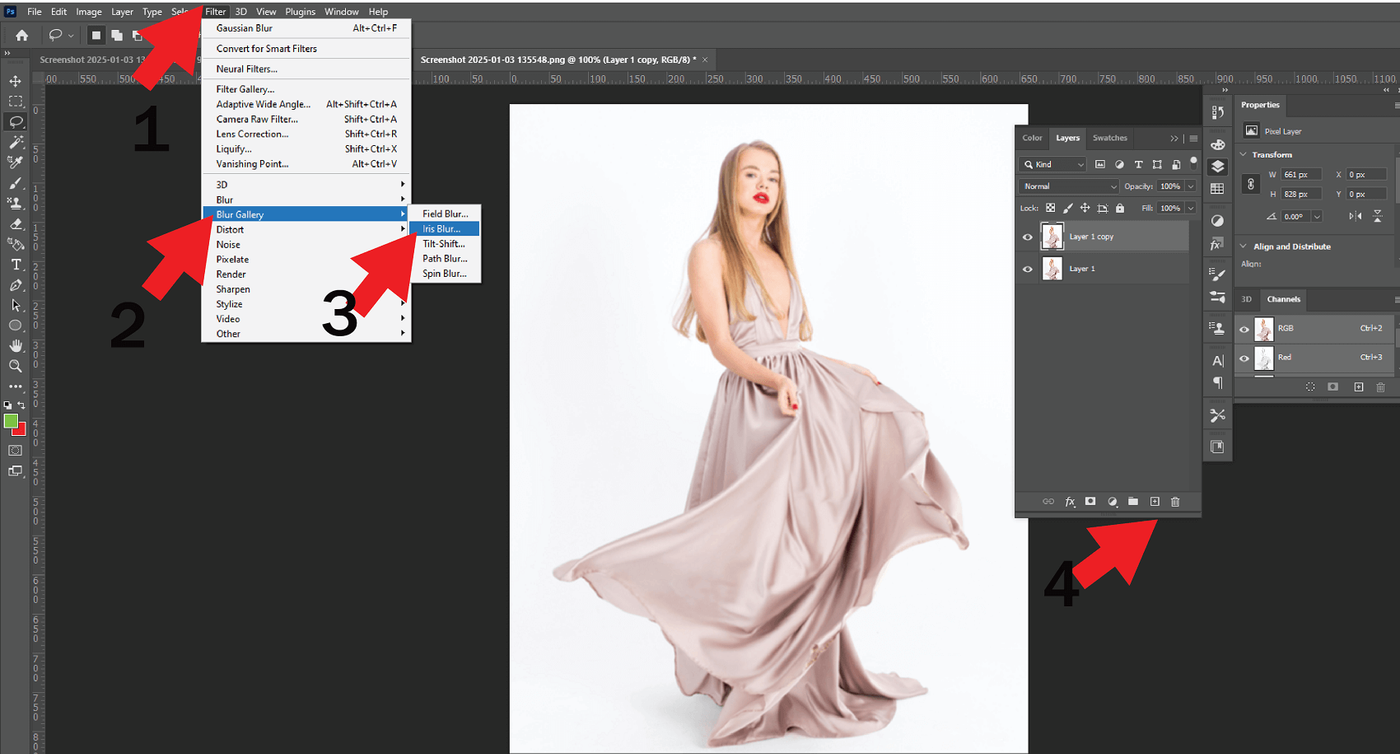
- Define the points on the image you want your focus to be.
- Adjust the points where you want the focus to be. Then, use the slider to control the level of blurriness for each point.
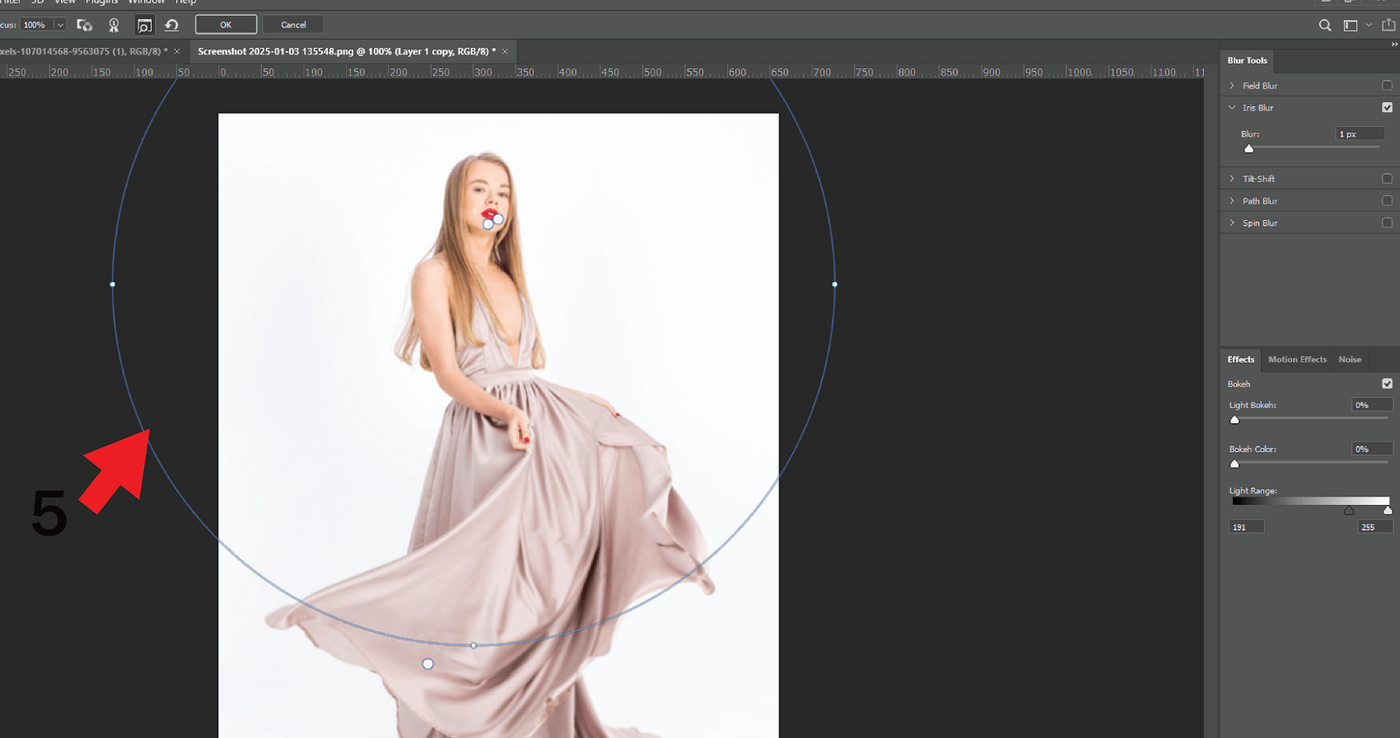
- You can add or deduct points if necessary.
Way 2- Lens Blur
You follow the first step and follow the second step. But choose Lens Blur instead. Now follows
- Choose a source. One is Alpha 1. It is the basic one. It will apply the same level of blur to the whole image. If you want a more complex option where you want to remove blur at different levels from different maps, go for 'Depth Map.'
- If we work with Alpha 1, you will see a blur scale. You can control the blur level from there.
- You can adjust the area in multiple shapes. Like linear, circular. Choose how you want it.
- Now, if you want to keep the foreground blur and background sharp, invert it. Otherwise, let it be.
Conclusion
There are many reasons for an unblurred image, but everything falls under the basic 3 roofs we have mentioned above. All the solutions are somewhat the same and have small changes that can only be caught by a pro designer. By mastering these Photoshop techniques, you'll transform your blurry photos into stunning images. Try these methods today, and share your results with us!
Written by
Isabella Garcia